Showing posts with label recycled project. Show all posts

All the windows have open!

My Advent Calendar is looking so good that I will definitely make some more. They will be great gifts. :)

My first Advent Calendar

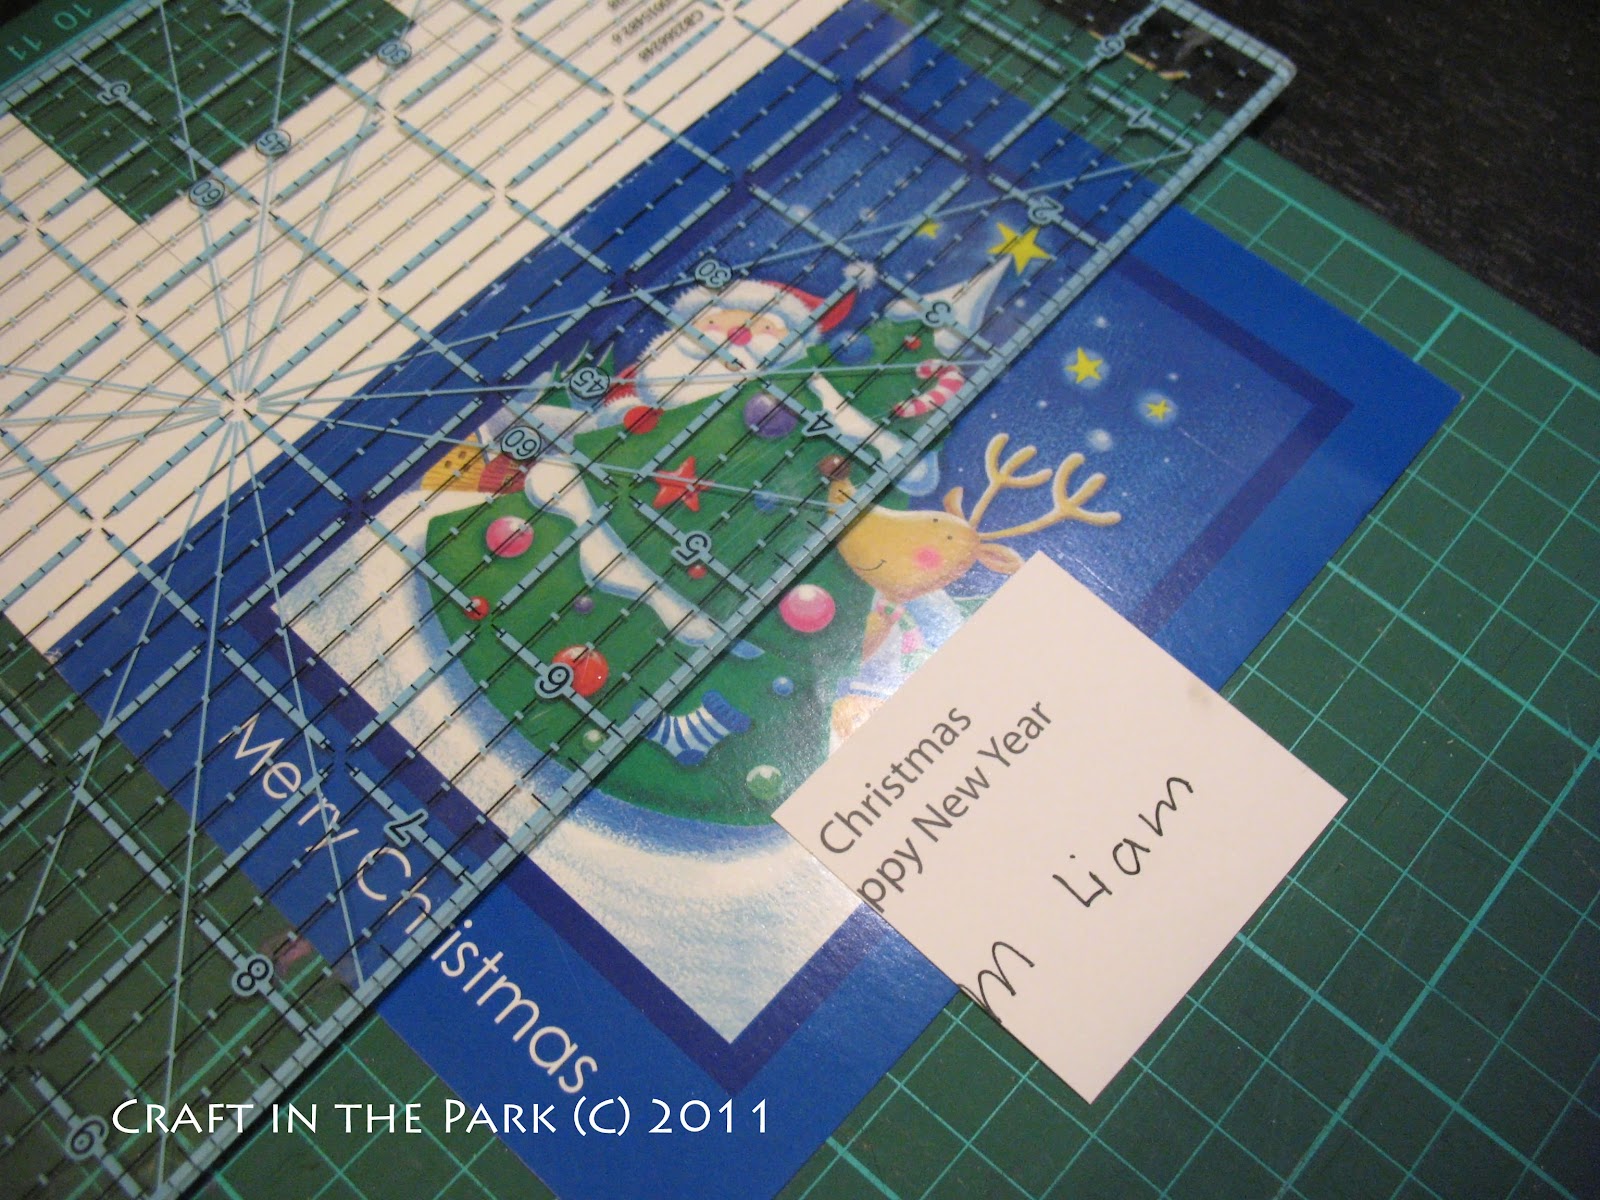
I am so proud that I made my first Advent Calendar all from recycled materials - Ellie's Christmas cards. We have been keeping all these cards for a few years now. This is one great way to turn them into something that we can use instead of just something to be kept in the cupboard.

The cutest thing about this calendar is that the card sender's signature/name is on every window. Every morning Ellie opens up a window and finds out which child sent her a Christmas card and what the card looked like.

Here are some brief instructions of how I made them:
1. Cut out the name/signature first.  Make sure you leave enough space around all sides as window frames. The border of my windows are 1/4" because I used quilting rulers.
2. Use the cutout name/signature piece as a template to cut out an interesting part of the card.
3. Cut a big "I" on the back of the name/signature piece. Use the back of a knife to score the two sides of the "I" to make it easier to open the window. 
4. Glue the name/signature piece onto the card cutout in step 2. Now you have your first window. Repeat this for the next 23 windows.
5. Glue all 24 windows on a big cardboard (mine is a house shape as I want to make a village if I can make one a year). Any shape will do.
6. Cut numbers from a used calendar and glue the numbers on the windows. It will be good to save a couple of pages from previous months earlier so you can have them all in the same colour.

Voila!! The calendar is done!

I will post a picture when all 24 windows are open.

Some new ice-skating outfit

I have been wanting to make some new outfit for Ellie when she goes ice-skating.  For so long, I have done nothing.  Suddenly, I finished a few things for her to mix and match. 

Here is a top from Simplicity pattern 3810.  I loved the little rose to make it extra special.


I added a bow with long trailing ribbons hoping that they will fly on the ice.  ;)


This top is my very-proud-upcycled creation.  I was about to throw away this very daggy stained skivvy.  The solid colour of the fabric made me think that I can add some sparkle to it and turn it into an ice-skating top.   (All ice-skating outfit seems to have some sparkles on the fabric).  I kind of pictured that I wanted to get rid of the turtle neck and the sleeves are a bit short and there were some stained area need to be cleared.  So, I cut the sleeves and replaced them with the sparkly fabric (oh forgot what it's called now).  Then, I cut the turtle neck and finished the neck with bias tape made by the same fabric.  Then, I made different yo-yos from the fabric just to cover what I don't want to see.

I cut so much from this skivvy that it now looks completely different.  The yo-yos came in really handy to cover them up.  Instead of giving away her stained top, her skivvy now has a new life and become something that I am so proud of.  :)


The hardest thing was to sew the neck as the layers of fabric was quite thick.  I don't remember how much I pushed my sewing machine to the limit.  I think I ended up hand-stitching the thickest point.


Original


I even used the leftover fabric for a headband. 

How many nights did I spend on this?  Quite a few but I had lots of fun.

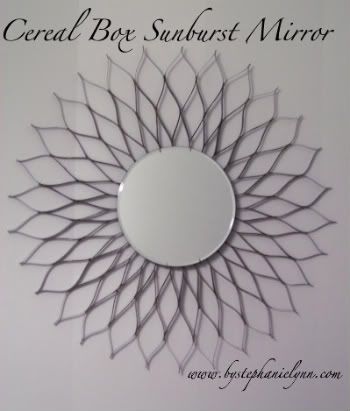
A mirror from a recycled box

I found some really creative, crafty instructions to make this mirror. So inspired that this will be one of my next projects in the summer holiday.  It's amazing how you can do all sorts of things with paper.  I need to put aside more cardboard and paper in case I need them ...

A PJ from an old T-shirt

I have been wanting to make a nightgown for myself for summer. I wanted once that is comfortable to wear but no looking too feminine. So, I decided to make it with some stretch fabric but I then realised I didn't have enough meters. While I was rummaging my fabric tub, I found this old T-shirt of my husband that I saved and he no longer needed. I put it on straight away to see if it would be long enough to make a nightgown. It's perfect!!! So, I folded it in half, cut up the sides and some sleeves, overcast the raw edges and sewed them up. It was all fun and a quick project. I am a children size 12 in Australia. A "M" size men T-shirt can easily fit me as a nightgown. What a surprise!


Fabric hunt in Op Shop???

My friend Nayth got some really fantastic ideas!!!  She could combine charity and recycling and craft all in one project.  She just turned a table cloth rescued from Salvo into a beautiful tote bag.  It's certainly the highlight of my week seeing her using her beautiful bag.  This reminds me of  this post from Holland that tea towels from op shop can be a great source of materials.  The colours can be so fantastic!!!

A notebook of ideas

On the weekend, I went to the Bowerbird Bazaar Adelaide Design Market.  I was so thrilled to see something new and something different than we normally see in the other markets in Adelaide.  I started to become a market and garage sale fan.  It's like a treasure hunt and you never know what you will find.

In the Bowerbird Bazaar, there are many interstate traders with amazing designs and quality work on display.  Some even come from Tasmania.  I feel so privileged to be talking to the traders and see what they are offering. There is this Melbourne group Rebound Books showcasing rebound books.  It's my first time seeing vintage book covers rebound on notebooks and diaries.  I am used to the idea of decorating plain notebooks.  I never thought that covering the notebooks with vintage bookcovers would be so charming.  

I recently inherited 2 boxes of old Better Homes and Gardens magazines.  Some of them are back in 1994.  Inspired by the market visit, I touched up my "idea" book with my not-so-vintage magazine covers.  I loved it so much that I want to make a few more as gifts or even to sell.  Now, this notebook reminded me that I used to cover my textbooks with beautiful flyers of concerts or exhibitions in my middle school time.  I still remember one of the flyer was an ice-cream cone of 3 scoops of ice-cream in pink, yellow and green for a summer concert of the orchestra.  It was a gorgeous poster.

Front:
 Back:


A felted bag

I crocheted the flower again with a crochet hook of different size. The result was not what I expected. The crochet flower is a beautiful decoration of something like a bag. So, I decided to make a bag with it. I have felted the cut-up woolly jumper earlier with a hot washing. They seemed to be a perfect match. I took out the scissors and cut and cut and stitch ...

The bag was born. I did think about taking more pictures when I made the bag but I ran out of time to do so. I was making the bag as Ellie's friend's birthday present. The party is tomorrow. I shouldn't have left it until the last minute. Back to the bag, I really liked the running stitches. I should explore to use it more. There is also a inner layer of fabric that didn't show as I didn't like the raw stitches showing in the inside of the bag.

Since it is a birthday present, I made a little tag under my new shop. Should I be making a pattern for this bag? I really wanted to. There are a couple of things I want to improve. I am not going to make a similar one until I have some woolly clothes to felt!!! If I get enough requests how to make one, I will have to think about it.

A gift bag

This gift bag was made from an ordinary paper shopping bag with paper girl figure. I love her eye lashes that were made with brown feathery yarn.  You probably noticed that her back looks bigger than her front.  Well, it's a little design mistake. ;)  My daughter and I cut and glued this little girl together.  We had lots of fun decorating this bag.

A drawstring bag from a dress

Ellie grew out of this dress a long time ago, but I do love the colour and the pattern of this dress. I have saved it and waited for the inspiration to come.  One night, I cut it up and turned it into a drawstring bag that we use it every week now for her ice-skating outfit.  Since the fabric is a stretchy material that can stretch both ways, I learnt the "new" technique from a machinist in the ice-skating club that I need to use zigzag stitches for this kind of material!!! I wish I had met her earlier?!!!


A down quilt (reconditioned)

A down quilt made from a pre-loved down quilt with not much down or feather inside AND three pre-loved down jackets. The process is very messy. I first removed rows of stitches from the quilt. Then, I cut open the down jackets. You cannot possibly imagine how much fleck of down was floating in the air whenever there was any air movement. As soon as my hands were near the down, the down would fly everywhere. It's not a scene that anyone would like to see. Really wonder what the down jacket/quilt factory looks like inside with every worker wearing face masks??? If you are not careful enough, you can have more down on the floor than inside the quilt. It's a tricky project. I call this "reconditioned" - the same idea as the engine of my car got a new life by the mechanic that every component inside was new. Now, every pocket is full of down and will last for years.

A reupholstered chair


My first reupholstery project. This chair looks a million times than better than it used to be. I scrapped all the black paint off the wood, applied five coats of varnish, replaced the foam seat and wrapped it in a fairly modern looking fabric. It took me almost one year to finish it but the result is worth it!!!

The chair used to look like this:


When I finally put the chair together, I borrowed this book from the library which is still on sale nowadays. I was so amazed how an ugly chair could turn into something good enough for royalties in this book. I even showed the pictures to my husband. He started to be curious how it's all done. ;)
The Complete Guide to Upholstery: Stuffed with Step-By-Step Techniques for Professional Results

A hand towel


Spring has come!!! It's time to "spring up" the house. I added the floral pattern to a plain white hand towel. The bathroom is a lot more refreshing now.

A dress and a cap for Ella

This dolly dress and cap is made by Ellie's old T-shirt. The big floral pattern is perfect to be the new dress. I thought I could just slip the dress on the dolly because of the stretchy material. It turned out that the dolly head was way too big that I had to cut up the back and put some velcro on. Ellie was so happy that the dolly could wear something that she wore before. :)

A pair of leg warmers

My daughter really wanted a pair of leg warmers for ballet dancing. I cut up the sleeves from a pullover that I no longer wear, cut a slit on each sleeve and serged the edges. Voila!!! Done!!!

Gift bags

For my daughter's birthday party, I bought some really nice craft kits for the kids as gifts to take home. Since the craft kids are unusually big, I can't find any party bags that are big enough but won't break the bank. I decided to make my own party bags. It took me a while to figure out how to make the bottom right. Then, I kind of worked out how to fold up the bottom nicely. I made more bags than I needed as I really enjoyed making these beautiful gift bags. I even used my daughter's painting into gift bags. Now, I've got some piled up at home for parties.


Something for the wardrobe drawer

I made this for my daughter's wardrobe drawer from same kind of Fuji cardboard boxes. I cut a box and glued in a partition board. And then, I glued fabric both inside and outside the box. When it's all dry, it is one great lingerie and socks storage.

A shopping bag

A friend of mine is coming to Adelaide for a visit. Really want to give her a gift to bring home. So, I asked her to give me some old clothing and I would turn them into something useful.

She gave me this red corduroy shirt that she no longer wears and she would like it to be a shopping bag.

Voila!!! I added some floral print of mine to make this shopping bag. She loves it.

A "recycled" cushion

My daughter loves this cushion that I made. She asked me what it made of as she really likes it. I said, "Rubbish ... This cushion is made of rubbish". I have been saving scraps of fabric that I used in many other projects. I have got enough to make a cushion insert. So, I sewed a plain one and stuffed in all the scrap fabric. The cushion cover is also some left-over fabric. This is why the cushion cover is in two different colours. I made this felt in the middle when I learnt felt making in the local library. Finally, I managed to use it in a good way.

Recycle Fuji Xerox boxes

We use tons of paper everyday in the office. The good thing is that I am never running out of those sturdy boxes from Fuji Xerox. I took one home and tried to revamp it. I ended up using lots of glue to glue on some left over fabric. The result is ... at least, I prefer to use the revamped box rather than the actual Fuji Xerox box.


LinkWithin

Related Posts with Thumbnails